
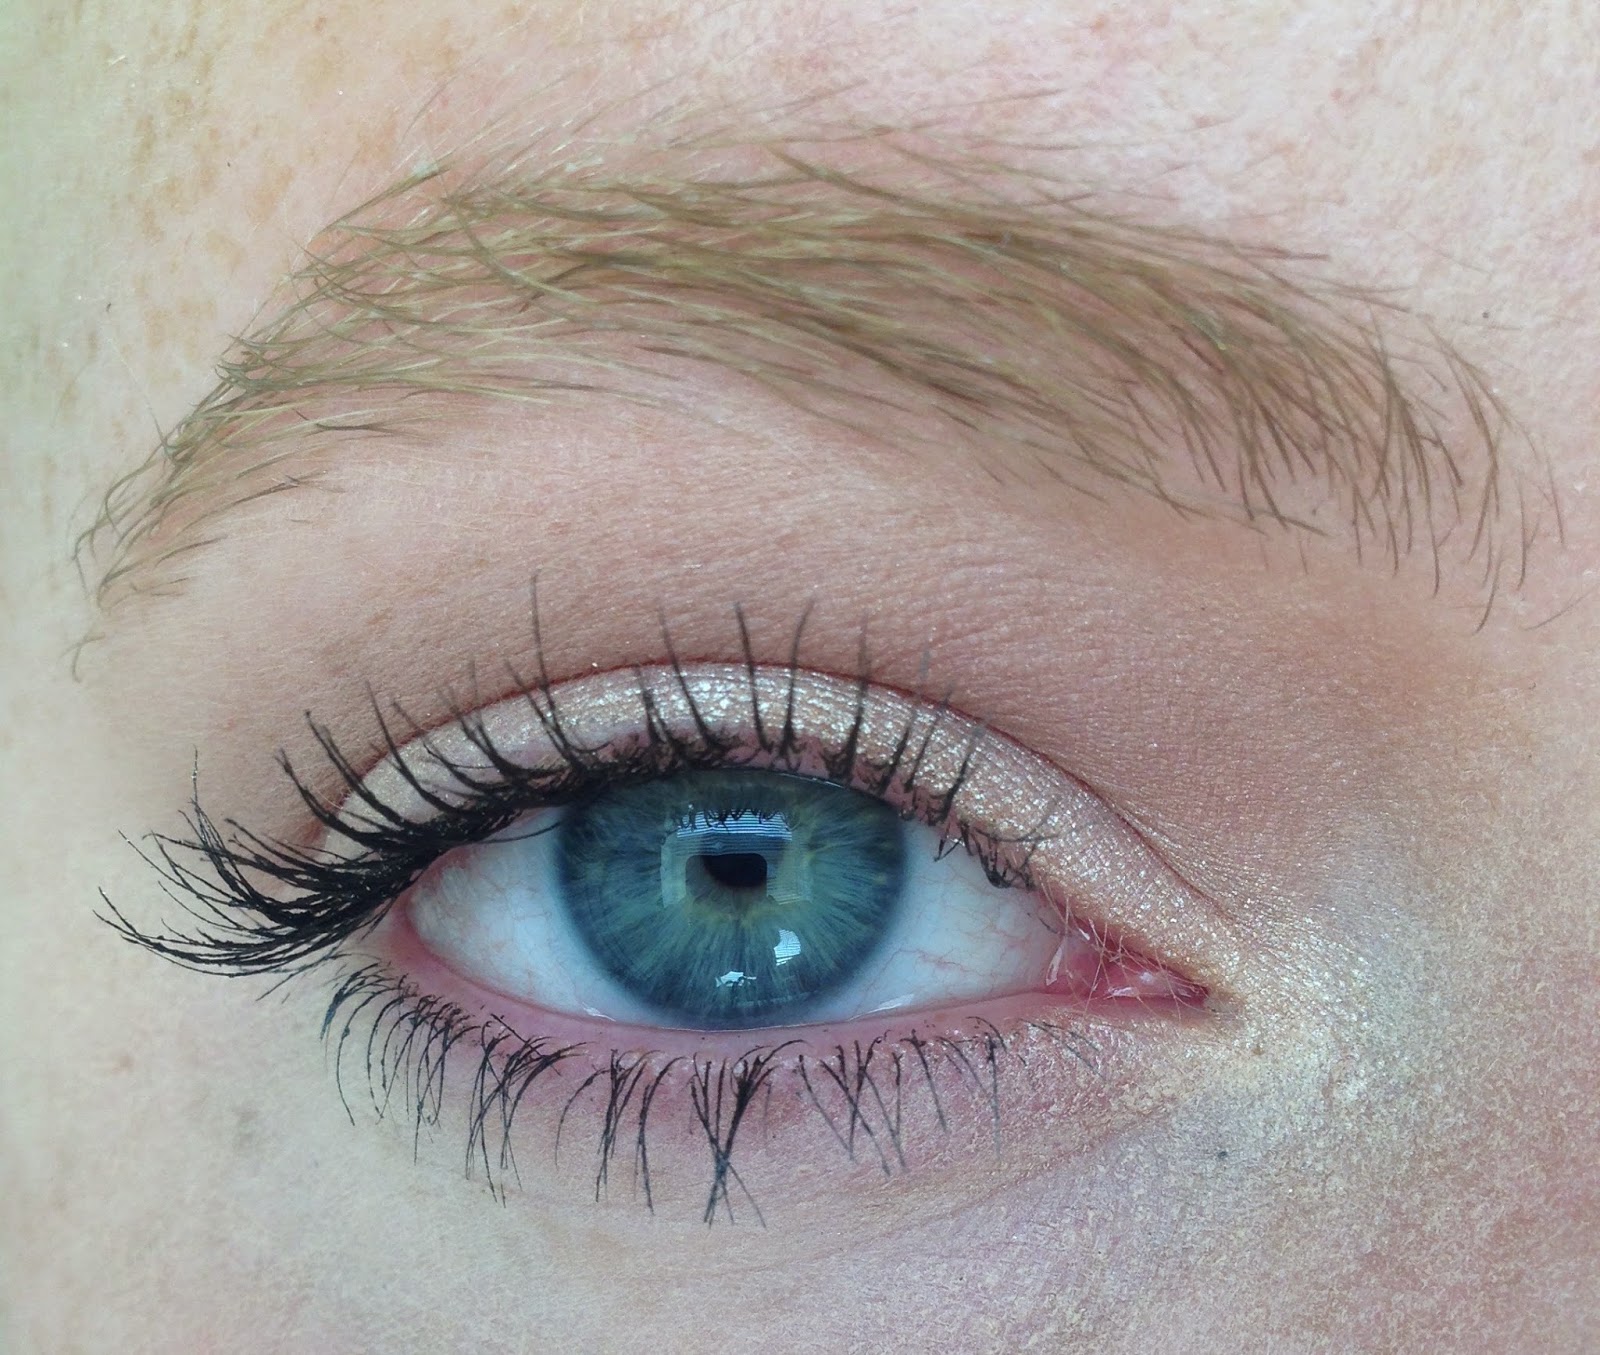
Neutral Glam | Naked Palette
Some days I just want a simple makeup look that will look great with any outfit in my closet, and with any lip color I choose. This look is that, but with a little more glamour.

Product List-


1. Apply a primer/base/concealer to your eyelids. I chose to use concealer, and applied it under my eyes at this time too.
2. Set concealer/primer/base with a translucent powder, or light colored matte eyeshadow.
3. With a fluffy blending brush, apply Naked into your crease.
4. Using your finger or flat shader brush, apply Sidecar onto your lid. This shade has a lot of glitter in it, and to prevent the glitter from falling onto my face I lightly held a tissue to my face.
5. Use either or both a pencil brush and a flat definer brush to apply Naked to your lower lash line.
6. With a small pencil or shader brush apply MAC MSF in Soft and Gentle to your inner corner.
7. Apply mascara and do your brows to complete the eye look.


I absolutely love this look, it is so simple, and makes you look put together. I really like the glitter from Sidecar and Soft and Gentle to give this look something different, and more glamorous. Depending on your preference, virtually any lip color will look good with this makeup look.
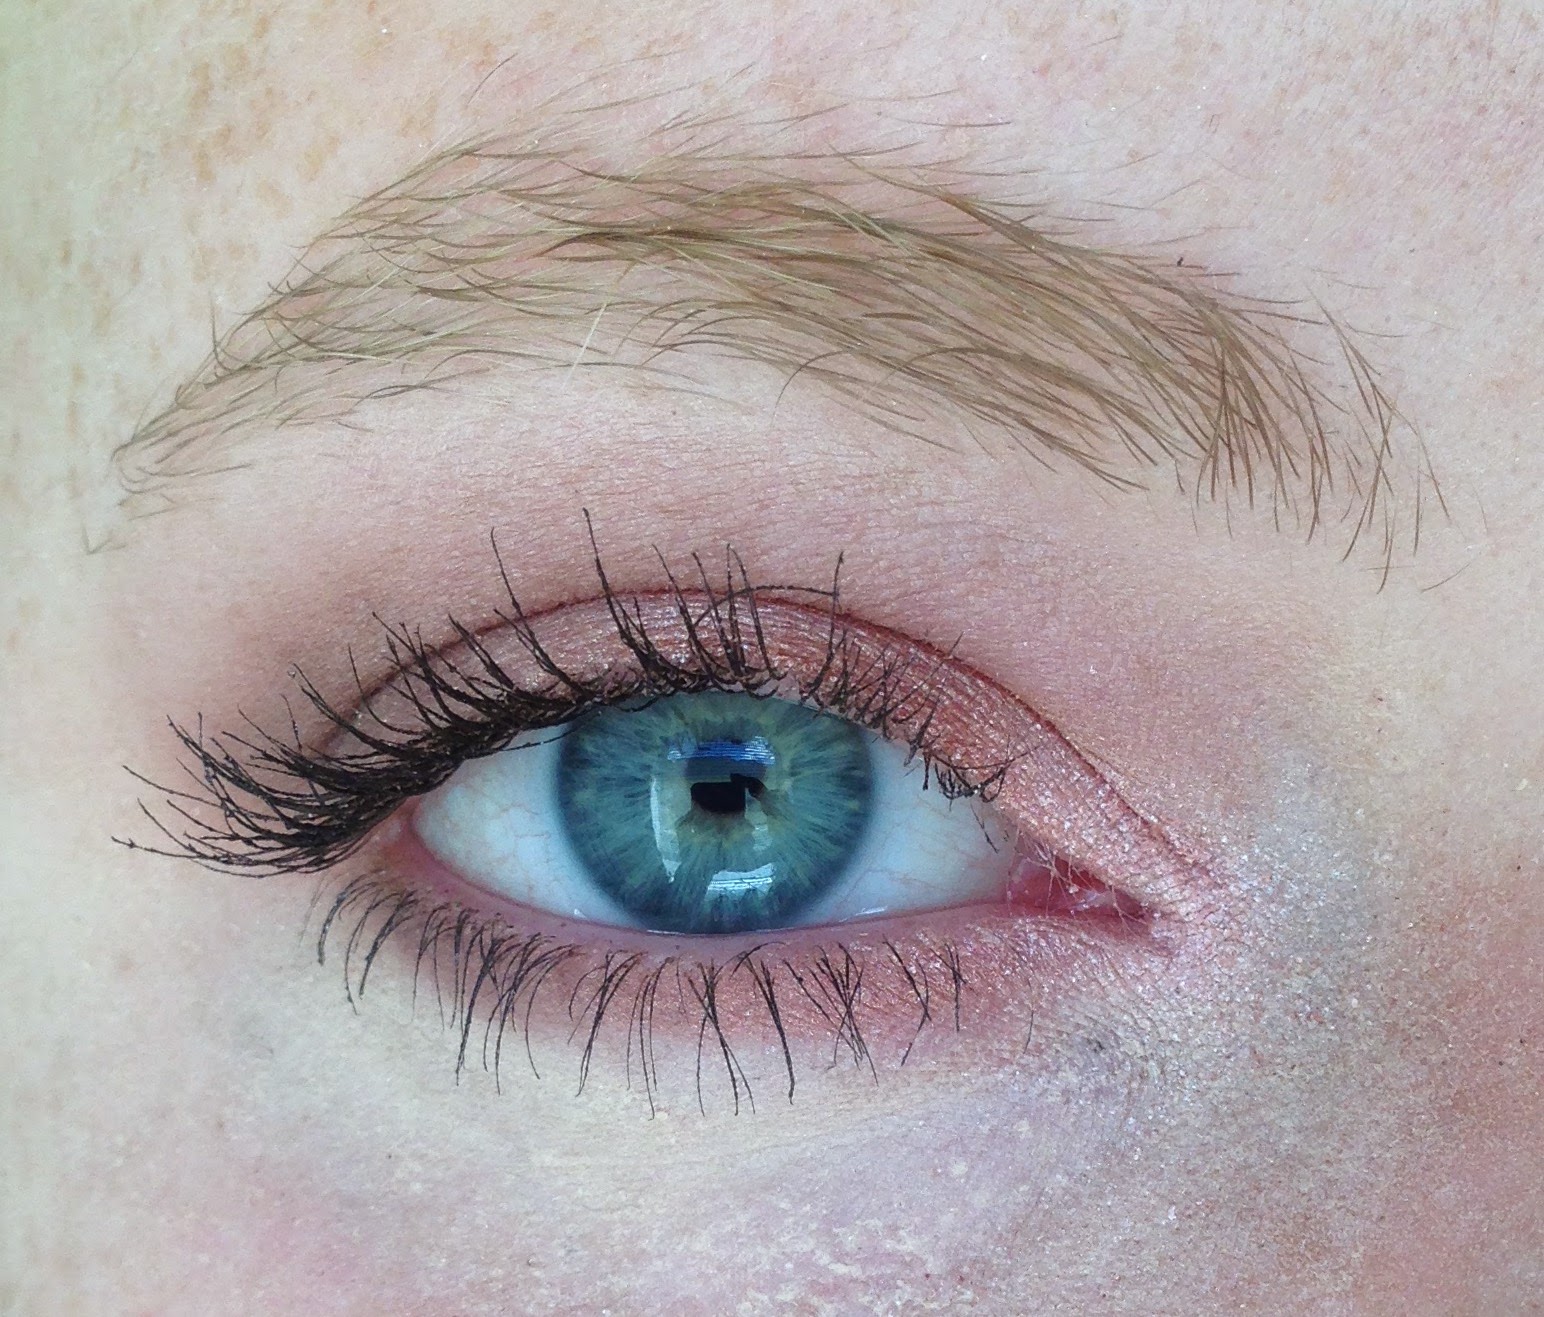
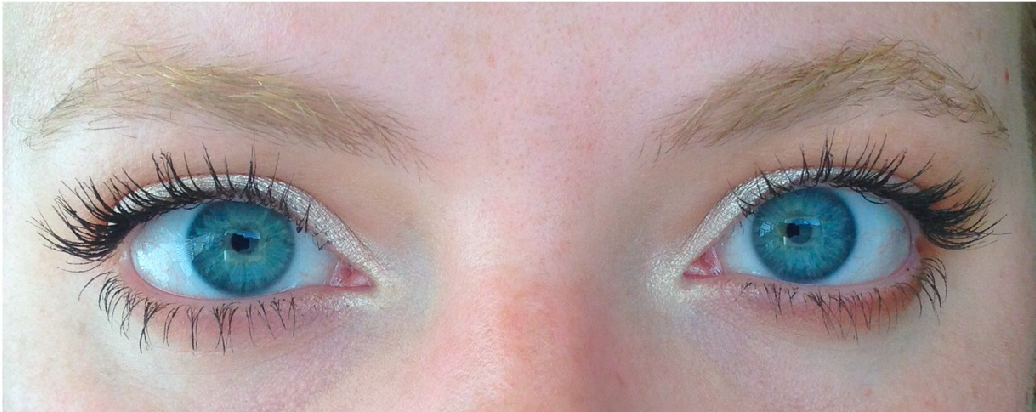
Stila in the Light Palette Tutorial
Today I am going to share my first tutorial using the Stila in the Light palette. It is another super simple look that is great for everyday wear.
I also show you what it looks like with a colored liner on the bottom lash line for a pop of color. I love to add a simple pop of color especially during spring and summer, it really changes the whole look. Hope you enjoy!

Product List:


1. Apply primer
2. Apply base, or concealer to correct discoloration
3. With a big fluffy brush, apply Bare all over the lid, inner corner, and brow bone
4. With the same fluffy brush, apply Bliss into the crease, blend this color up towards the brow bone for a gradient look, and onto the outer corner of the lid to add dimension
5. Apply Kitten with your finger, or a small flat shader brush, to the lid and inner corner
6. (optional) apply a colored liner to your water line and lower lash line for a fun pop of color
7. Apply several coats of your favorite mascara


Prom Inspired Smokey Eye Tutorial
Prom is coming up quick, and I wanted to get a tutorial up for a look I would wear to prom. I chose to go with a brown smokey eye because it will go with a lot of different dresses.
Even if you are not going to prom, I hope you enjoy this tutorial!

Product List:

1. Apply Urban Decay Primer Potion
2. Use a small amount of concealer as a base, and to conceal any veins or lid discoloration
3. Take a small piece of tape and apply it from the edge of the lower lash line to the brow
4. With a fluffy brush, apply Strange all over the eyelid, brow bone, and inner corner
5. (optional) Use a creamy brown eyeliner or base on the eyelids and blend slightly with a flat shader brush, this will make the lid color last longer, and use this color to tight line your upper water line
6. Blend Limit into the crease as a transition color, diffusing the edges of the brow highlight and brown base
7. With the same blending brush, apply Nooner just into the crease below Limit
8. Pack Factory onto the lid directly on top of the brown base, do not apply this color into the crease, and leave the inner corner free of this color
9. Using your finger of a small flat brush, apply Burnout into the inner corner
10. Remove tape and apply concealer to your under eye area, and set it with a powder
11. Line your water line using NYX Jumbo eye pencil in Milk, you can choose to use a brown, black or other color liner instead
12. With a fluffy pencil brush blend Nooner onto the lower lash line, smoke it out as far as you would like
13. With a flat definer brush, apply Factory closely against the lower lash liner, and blend lightly with Nooner on the pencil brush
14. Apply liquid liner, I only went about half way to make my eyes appear more open
15. Apply tons of mascara, and lashes if you've got 'em!


I love this look so much, it looks amazing on all eye colors and looks great in photos! If I were to wear this look for prom I would use a pale pink of nude lipstick, such as MACs Angel, Please Me, Brave, or Myth.
2 Fresh Easter Makeup Looks
Today, I created 2 different makeup looks perfect for Spring, and Easter. Both using the Naked 3 palette from Urban Decay. Look 1 is very light and minimal, and look 2 is just a little more dramatic, I think it could still be worn during the day, but it would also be appropriate for night time. Hope you enjoy, and Happy Easter!

Product List:
Look 1


1. Prime with Urban Decay Primer Potion
2. Use NARS Radiant Creamy Concealer as a base
3. Using a blending brush, apply Limit into your crease. And with a flat definer brush apply Limit onto your lower lash line
4. Apply Dust all over your lid and inner corner with a small flat brush
5. Blend out any harsh edges of Limit with Strange with a blending brush


Look 2
1. Apply Urban Decay Primer Potion to your lid
2. Use NARS Radiant Creamy Concealer as a base
3. Blend Nooner and Limit into your crease
4. Apply Dust into your inner corner with a small flat shader brush
5. Apply Trick onto you eyelid with a flat shader brush
6. Blend the edges of the crease colors and Trick lightly with a blending brush
7. Light apply Factory to the outer corner of your eyelids, blending it into Trick and the crease colors slightly
8. Blend any harsh edges from the crease with Strange
9. With a flat liner brush, apply trick to the middle of your lower lash line, and Factory to the outer corners of your lower lash line


These looks would go great with a lot of different lip colors. I chose to pair them with Colourpop's Scandy and Bound lipsticks, and they looked great!
Quick Everyday Makeup
We all have this mornings where we just want to lay in bed for as long as we can. Who am I kidding, thats everyday, haha!
Whether its everyday, or just a day a week, today I am going to share a super quick makeup look that I use all the time.
This is my go to everyday makeup look if I want to look nice, and glamorous early in the morning. Because lets be real, its not the best to do your makeup in the car every morning.
Product List:

1. Prime your lids with a primer or concealer, you want your eyes to look bright and awake all day
2. With a blending brush, sweep bronzer into your crease. This will be the transition and crease color, make it as dark or light as you wish. Add the bronzer to the lower lash line, mainly in the outer corner, this will make the eyes seem bigger
3. With a small flat brush or your finger, pack on L'oreal Infallible Eyeshadow in Iced Latte onto the lid and inner corner
4. Apply Mascara and do your brows
Just in case you have the color Kitten from Stila, or are curious, Iced Latte is an exact dupe for Kitten.
This eye makeup is not heavy, dark, or hard to duplicate, making it perfect for everyday wear. Another reason I love this makeup look is that I can wear it with any color blush, and every color lipstick! I can just grab one and go, and not worry if it matches the rest of my makeup.
I hope you enjoy this look and it helps you out in a rushed morning!
Day to Night Valentine's Day Makeup
Valentine's Day is just around the corner, and today I am going to give you a step by step tutorial for a simple V-Day eye look. This look is great for Valentine's Day, or any other date night you may have planned. It is natural enough for work or even school, and you can amp it up with a few additional steps to make it a night look.

Product List:


For the daytime look, and look I would personally wear here are the super simple steps
1. Apply a concealer/base/primer to the eye
2. Using a fluffy crease brush, apply Limit from the Naked 3 palette to your crease. This is the transition color so be sure to blend it pretty high
3. Using the same crease brush, concentrate the color Nooner from the Naked 3 palette onto the crease
4. Apply Strange on a flat shader brush to the brow bone and inner corner
5. Using your finger or a flat shader brush, apply Liar to the lid
6. Go back and blend the lid and crease colors using both Limit and Nooner
7. Apply a mixture of Nooner and Limit to the lower lash line using a flat definer brush or pencil brush
8. With a small brush apply Dust into the inner corner of the, blending it into Liar
9. Apply your mascara, and the eyes are all done!
This next part of the tutorial is for the more daring ladies who want there eye makeup to be a bit more bold. I chose a cat eye because it draws lots of attention to the eyes! These additional two steps make a world of difference in the look, and can transition the look from day to night in just a few minutes.
9. Create a cat eye using your preferred liner ( I used the Jordana Fabuliner)
10. Line your tight line, and water line with a black eyeliner
11. Apply mascara, and to make it even more dramatic false lashes!


Whether you plan on staying in for Valentine's or go out with a loved one, I hope y'all have a fabulous day, and enjoyed the look!
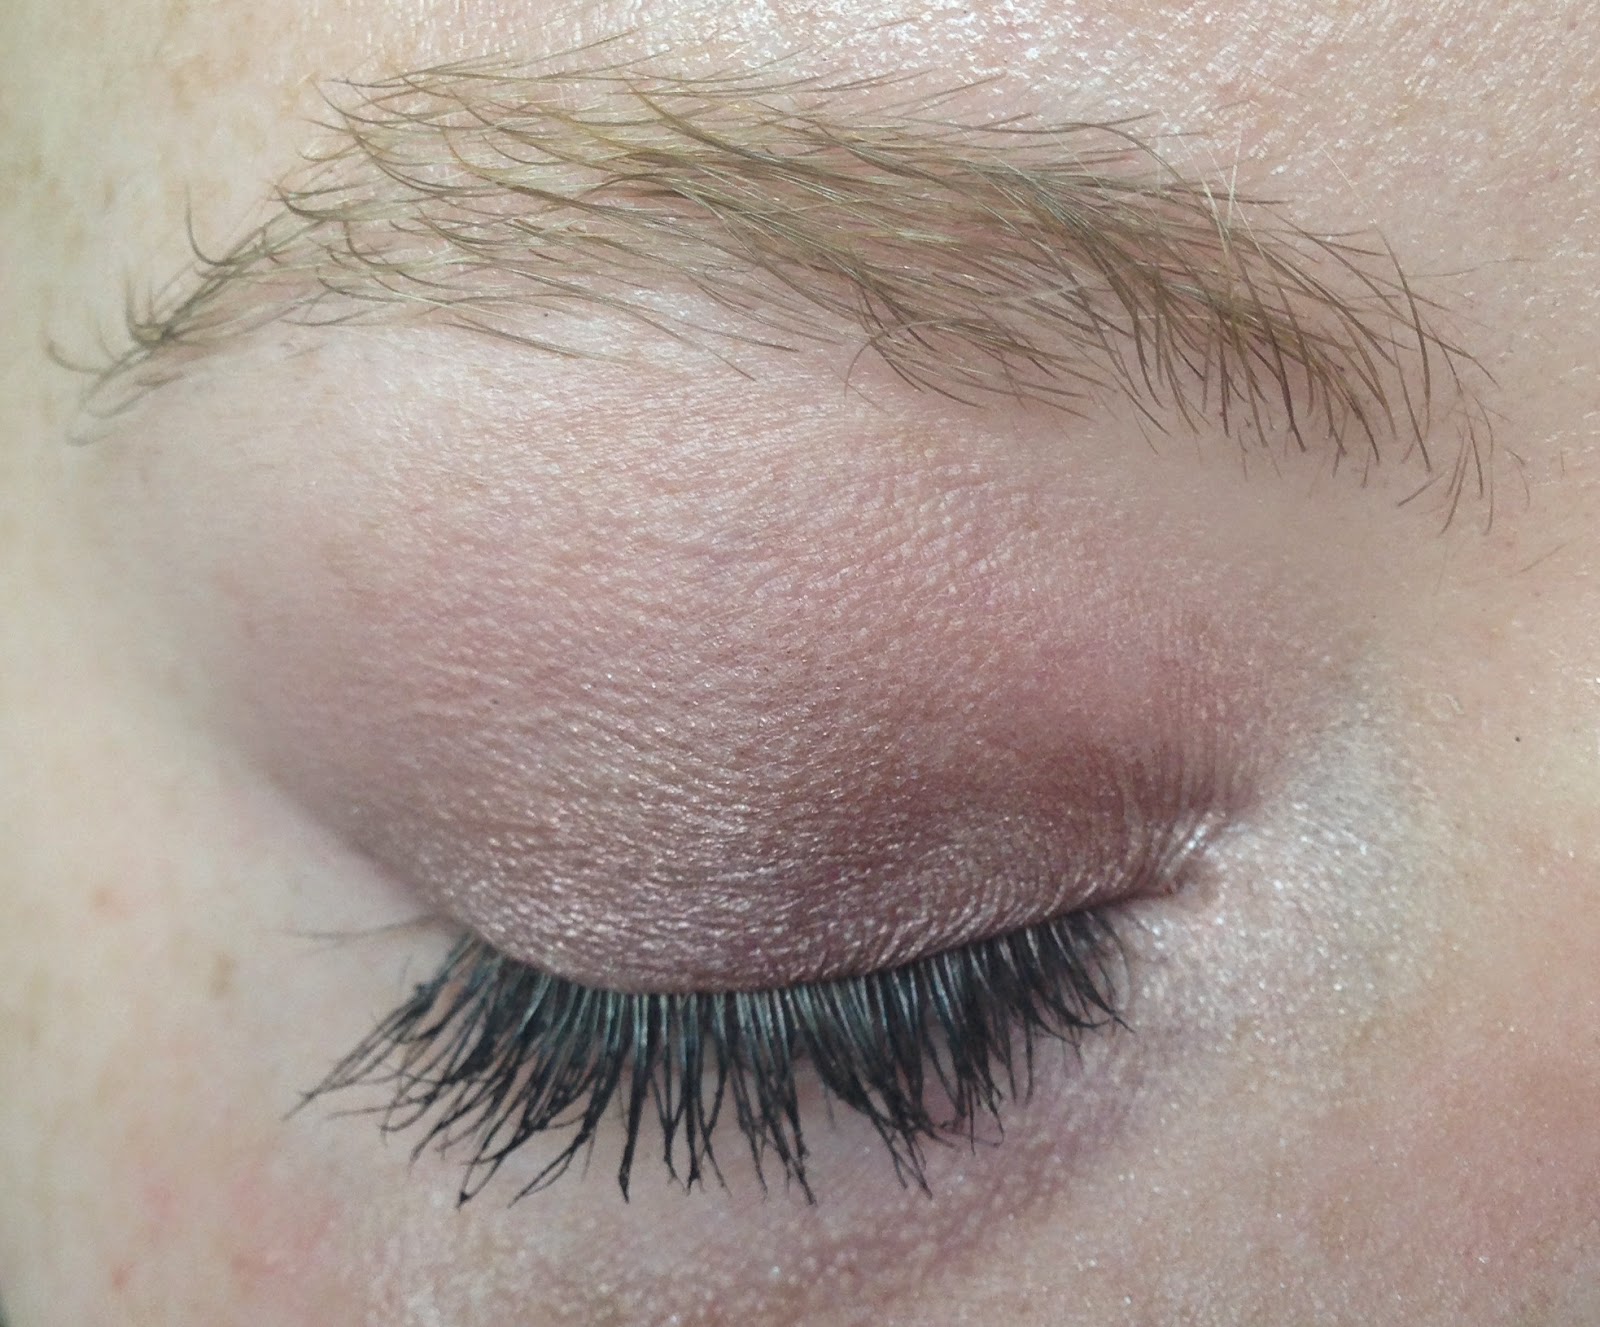
Simple, All Taupe Eye Look
Product List:
Urban Decay Primer Potion
Maybelline Color Tattoo in Tough as Taupe
Stila In the Know Palette
MAC Soft and Gentle MSF
Anastasia Beverly Hills double ended brush, or a shader brush, and fluffy pencil brush
Real Techniques base eyeshadow brush
Covergirl Clump Crusher mascara
Maybelline Clear Brow Gel / Mascara
NARS Radient Creamy Concealer
NYC Smooth Skin Pressed Powder in translucent

1. Prime your upper and lower lids
2. Apply a thin coat of the Maybelline 'Tough as Taupe' Color Tattoo onto the upper and lower lids, avoiding the inner corner and crease, with a flat shader brush and fluffy pencil brush
3. Using your Real Techniques base eyeshadow brush, gently blend the edges of the color tattoo
4. Use 'Rain' from the Stila in the Know palette on top of 'Tough as Taupe,' with the same shader brush and pencil brush
5. Pick up 'Air' onto the same Real Techniques brush, blending away the harsh edges of 'Rain'
6. Add more 'Rain' until you are satisfied with the darkness of the look
7. Using your finger, apply MAC MSF in 'Soft and Gentle' to the brow bone and inner corner of the eyes
8. Finish up your face, and the look is complete! (super easy, right?!?)


You may have noticed that all of the looks I post do not have liquid eyeliner, simply because I like the way my eyes look without it! I feel that eyeliner makes my eyes look like small little dots on my face haha, feel free to add liner to any look of mine that you try! Eventually I will post a few looks with liner, but I just prefer no liner looks because I love them and I rarely see any in the beauty community.
(Don't mind my crazy eyebrows lol, they were not cooperating!)
- The easiest was to apply winged liner is with a felt tip pen eyeliner, it makes the process SO easy, and quick. I recommend the Jordana Fabuliner, its cheap, and works wonders. Gel and liquid liners not in pen form are much harder for beginners to use.
- Lining tape up on the outer edge of your eyes going u to the tail of your brow, will give you a guide ensuring there will not be liner all over your face. It is not the most comfortable thing in the world but it gets the job done well. Be sure to stick the piece of tape to the back of your hand several times to get off the harsh adhesive that can pull at your eye area.


- Working in short strokes, and not trying to create one fluid line will help give you more control and precision. I like to start making dashed lines to start off with a basic liner, and then add the wing.

- Once you have created the wing, remove the tape, and apply concealer under your eyes, or complete your makeup.
Urban Decay Naked 3, Pink Toned Smokey Eye

Today I am going to give you the step by step directions to get this glamorous and simple smokey eye using the Naked 3 palette from Urban Decay. When creating this look, TAKE YOUR TIME! A good smokey eye is built up from lighter shades, NOT just applying a black shadow and blending it.
1. First off, when creating a smokey eye I recommend starting off with only a moisturizer and eye primer. If you apply your foundation before applying the dark shadows, you will get fallout and mess up your beautiful foundation. I used the Urban Decay Primer Potion on my upper and lower lid for this look to prevent any creasing and to make sure my eye shadow stayed in place.
2. (OPTIONAL) Next, I get two 2 inch pieces of tape and place them on the back of my hands in different spots to get the harsh adhesive off. Then I place the piece of tape under my lower lashes up to the tail of my brow, creating a defined line. This step is optional but I highly recommend doing so, because the tape creates a nice clean line so they eye look does not look like a bruise or like you have dirt on your eye.
3. Then apply a black eyeliner or cream shadow all over your mobile lid, getting as close to your lash line as possible. After applying the cream color blend it with your finger to diffuse the edges. Do not go too far into the inner corner, go in as far as you are comfortable, leaving space for an inner corner highlight.
4. Take any blending brush you like, for this look the only brush I will be using is the one that comes with the Naked 3 palette, with the shade Limit, and apply this all over the crease, Limit is going to be our transition color for this look, so take it pretty high up to the brow.
5. Next, take the color Nooner, and concentrate it more in the immediate crease, not blending as high up. For this step I cleaned off the blender side of the brush with a dry cloth towel, and picked up some of Nooner on the brush.
6. With a flat shader brush, apply Blackheart on top of the cream base we applied earlier. Packing on the color will help reduce the amount of fallout and make the color show up intensely.
7. You guessed it, more blending! Now take Darkside on a blending brush, only to soften the edges of Blackheart. Do not blend into Blackheart, just around the edges to create a smoother transition. This step will take some time, only pick up small amounts of Darkside and blend gently. It is much easier to add small amounts of color than try and take away or blend out color.
8. At this point in the look I put on a couple more layers of Blackheart and kept blending the edges with Darkside. Blend and pack until the look meets your standards.
9. Now take the shade Strange and apply this with a clean blending brush to the brow bone, diffusing the harsher edges of where the crease color meets the brow bone.
10. (NOT SHOWN) The day I wore this look I did not want a really bright inner corner highlight, so I applied Strange with a fluffy brush to lighten it just a little bit. But this look would be beautiful with Dust as the inner corner highlight.
11. (OPTIONAL) For the lower lash line I used a black eyeliner at the base of my lashes just to darken them, and smoked it out with Nooner. If I was wearing this look at night and going out, I would smoke it out more, and use Darkside instead of Nooner. Make sure to connect the lower lash line color to the lid colors.
12. Use any black eyeliner to tight line you eye, filling in any gaps on the upper lash line. You can also apply the liner on your water line, but I prefer not to, so that my eyes look a little brighter.
13. Apply tons of mascara! False lashes would be absolutely gorgeous with this look.
14. Now it is time for your foundation and face products.
A smokey eye look will be very dramatic, and the center of attention on your face. So if your face is not looking flawless, it will draw attention away from your eyes. Also, make sure to balance the color on your face by applying bronzer and blush. This will keep your face from looking flat. A good under eye concealer will be your best friend when creating this look, it will mask any imperfections and make your eyes pop.
If you are going for a very bold and dramatic look, hot pink lipstick looks awesome with this eye look. If you want the eyes to be the center of attention, go with a nude-ish pink lip.

Clinique All About Shadow Quad, Easy Tutorial

The Clinique All About Shadow quad is a warm toned neutral palette, kinda. The dark brown in the quad is the reason it is kinda warm toned. The brown has a green tone to it, that is not noticeable on the eye. Needless to say, the eyeshadows are awesome, super blendable and pigmented. Depending on where you live, you can find this quad at Sephora or Clinique counters, for $28.
From L-R, the shades are; French Vanilla, Peach Pop, At Dusk, and Olive in My Martini.

The look I created with this quad today is neutral and simple, yet colorful, perfect for spring.
1. I applied a base to my eyes, I used Maybelline's Instant Age Rewind Concealer
2. I applied Peach Pop to the inner third of my eye and tearduct, using my finger for a brighter application
3. I applied At Dusk to the rest of my eyelid and the bottom lash line, connecting it to Peach Pop, I used my finger as well for this shade because I really like the control I have with the colors, but this shade would show up the same with a brush
4. By tapping my finger, with little bit of Peach Pop, over the edges of the two colors I created a seamless transition
5. I applied Olive in My Martini to my crease, using a Real Techniques crease brush
6. I cleaned of the same Real Techniques crease brush, and then dusted French Vanilla on my browbone, and blended away the harsher edges of Olive in My Martini
7. Lastly, I applied a coat of mascara, I used Maybelline's Mega Plush

No comments:
Post a Comment